Another country, another new craft... Or maybe two. But I'll hold off on sharing about the second one. First things first and all.
I have been wanting to try batik for decades, literally. I think I was still in elementary school when I first decided that I want to make my own fabric. And tie die did not cut it. Over the years, I've looked into fabric and yarn dying classes but couldn't work up the courage to fork over a handful of hard-earned dollars to make it happen.
That is, until Bali. Things here are affordable. And Indonesia is the center of modern batik. The tradition of dying fabrics with a wax resist dates back a long time, some say more than 1,500 years. The last couple hundred years, Indonesians living in Java have really pushed the art form farther and, lucky for me, my instructor Widya grew up in Java and has been practicing his craft in Bali for the last 25 years.
So what exactly does batik entail and what did I make this time? Well, as the saying goes, a picture is a worth a thousand words....
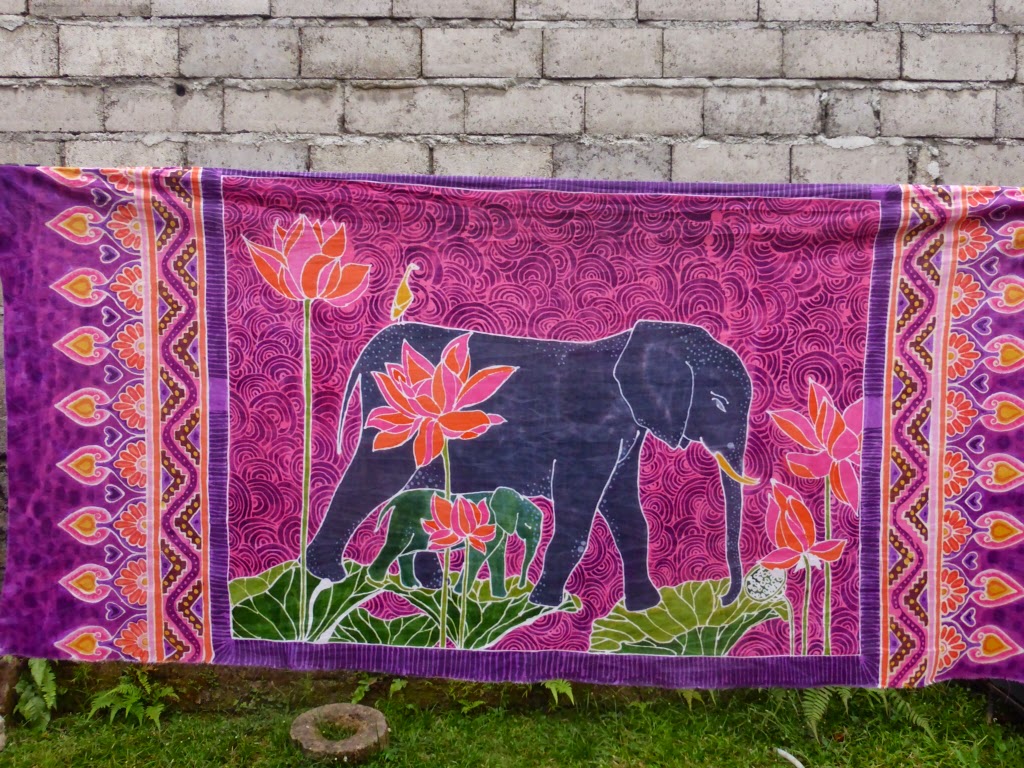
First I drew on paper some elephants I'd seen in South Africa's natural park. Then, I traced those onto my white cotton fabric, along with some lotus flowers and other greenery.
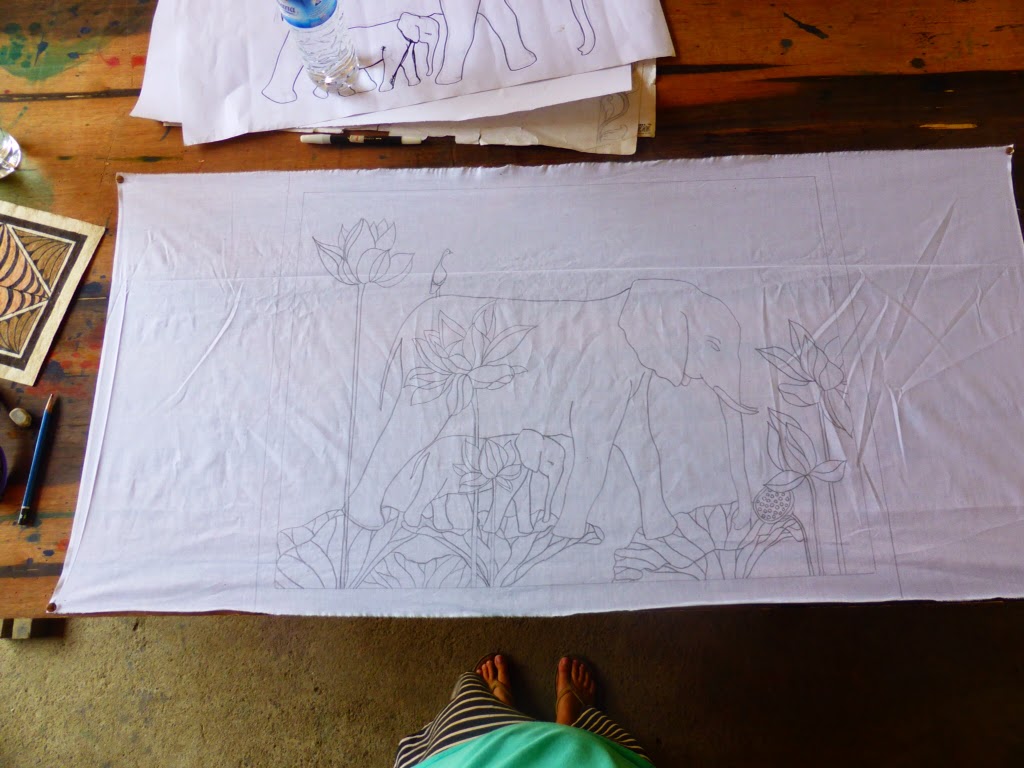
Next, it was time to get waxed! Not me, silly. Rather, it was time for me to attempt to retrace my pencil lines using hot wax that drips from a special tool called a chanting (or djanting, depending on who's spelling it). Yes, this wax hurts when you drip it on yourself as I inevitably discovered firsthand.
When I was done with the chanting, Kumon (Widya's brother-in-law) held my fabric up to the light, noting where it had not soaked through and then retouched my work. A lot.

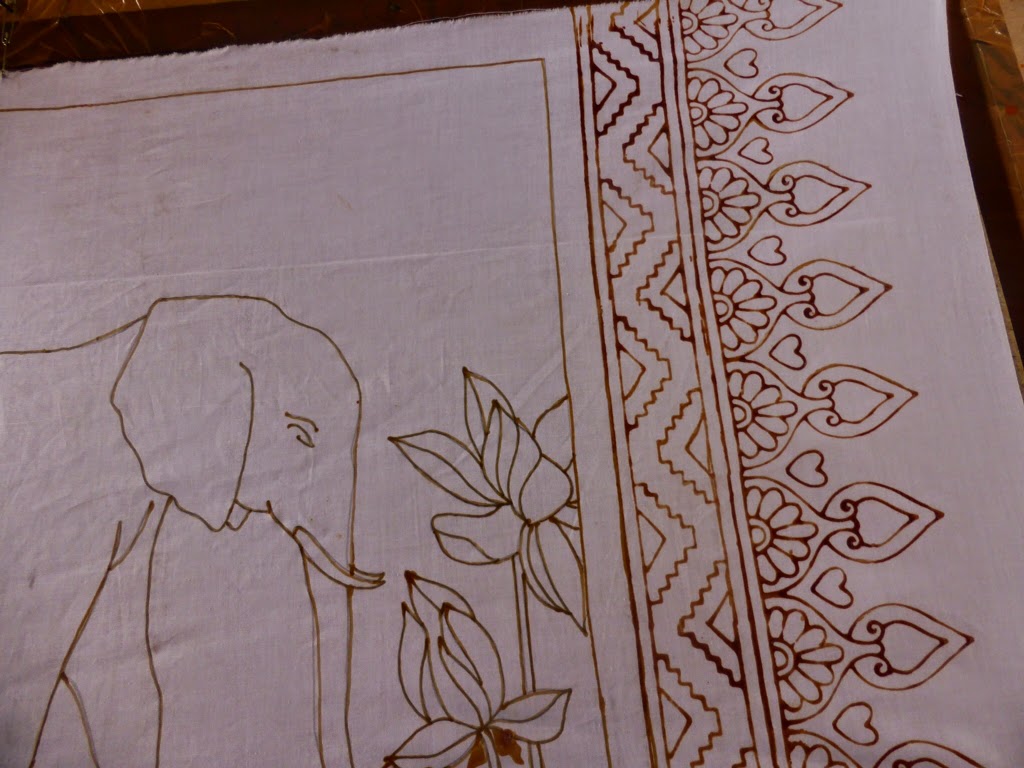
Then it was time for the wax stamps. One of ways to speed up the batik process is to use bronze stamps dipped in wax and then applied to the fabric. This is also a handy way of making repetitious designs and covering the edge of the fabric which is more challenging than the middle.
With the first round of waxing done, it was finally time to paint! and paint-by-numbers I did.

I even made a cheat sheet of my design with colored pencils indicating my choices.

Using this handy color swatch as a guide. (Luckily I'm not the only Type A person in this craft!)

After the first round of painting was through, I opted to do another layer of waxing. This is totally optional, but it makes for more complicated and beautiful designs. It also takes longer, making mine a two-day project. And again proving that persistence leads to perfection... Or at least interesting results.


After waxing, comes painting. Again I relied on my trusty notes and Kumon helped out so as to speed things along.
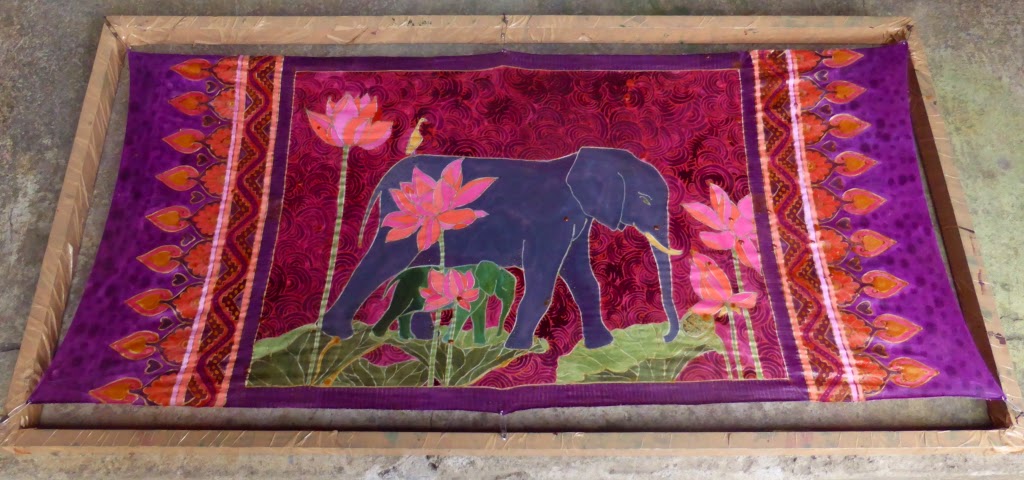
Once the second layer of ink was dry, it was time to dunk my work five times:
- First in the fixative so the dyes would be permanent,
- Then in cold water to rinse off the fixing chemicals,
- Next in hot water to melt off the wax (be sure to stir well with a big stick!),
- Then back into the fixative to preserve the dye which was under the second layer of wax, and
- Finally back into the cold water for one last rinse.

Then hang to dry and celebrate!
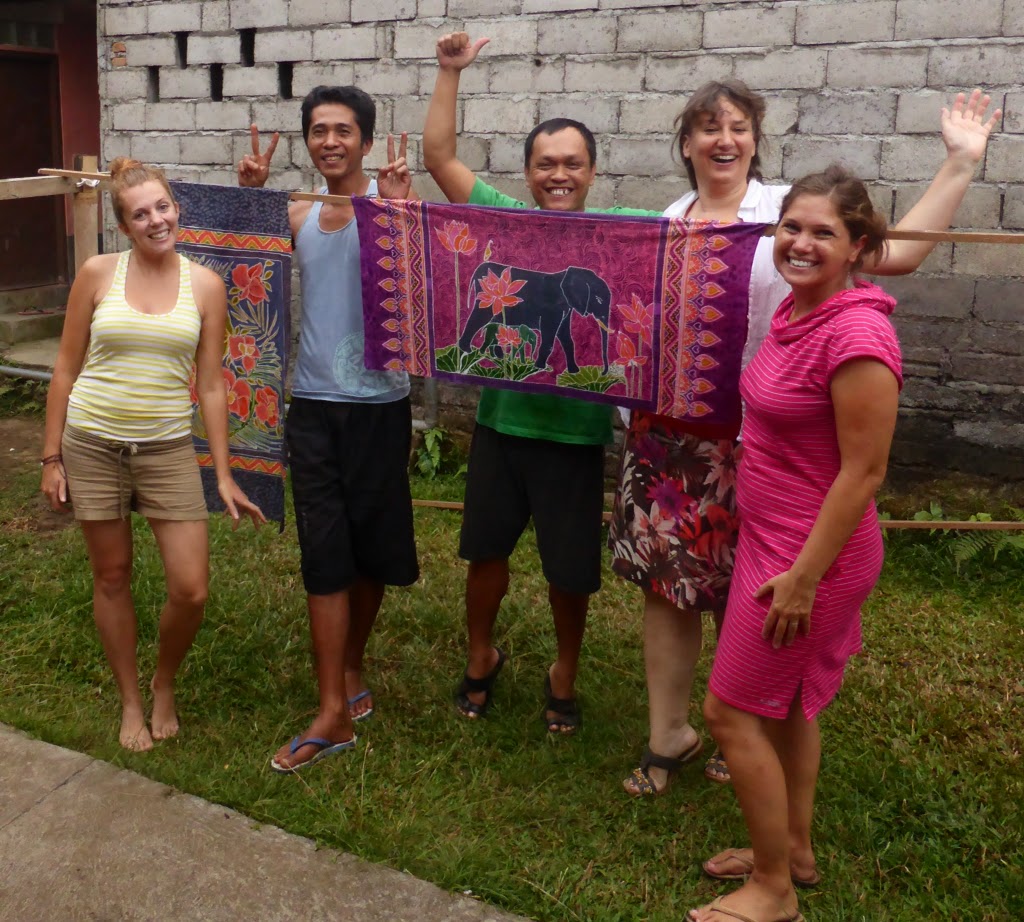
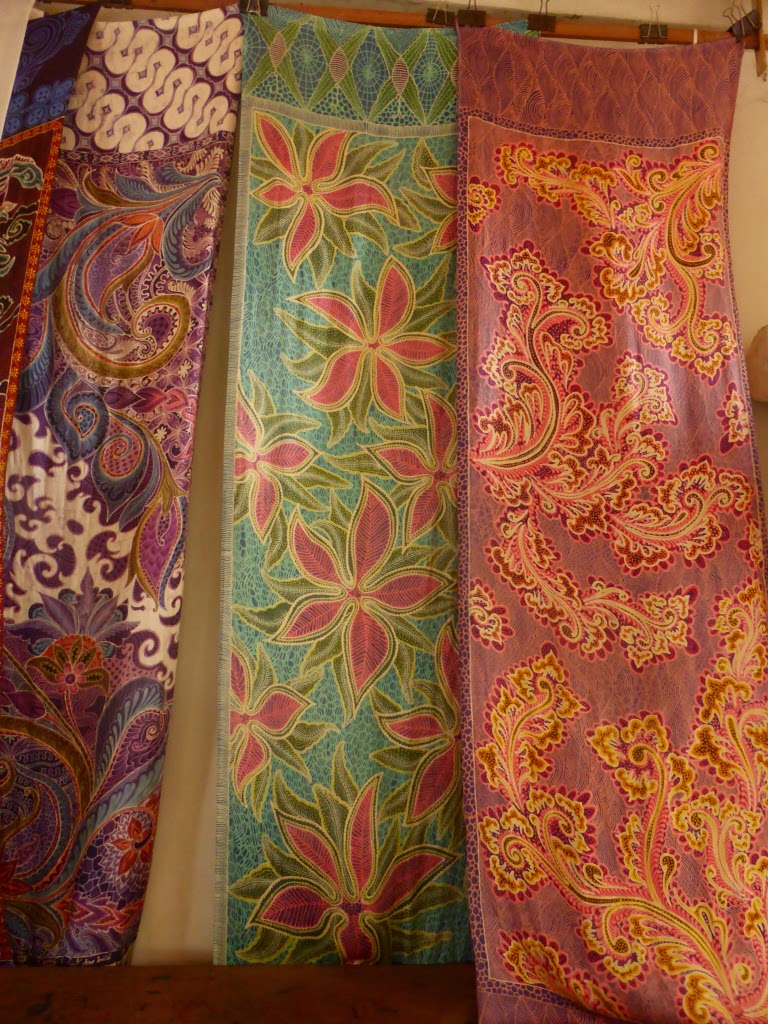
I know you are all so impressed with my handiwork, but just in case you're having a tough time imagining what one might create in 5 days on a single project, here are some shots of Widya's and Kumon's beautiful works:

No comments:
Post a Comment